How to Edit/Create a Flyer in Microsoft PowerPoint
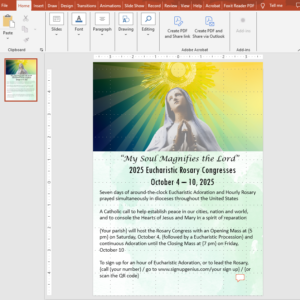
We provide our coordinators with a wide variety of flyer templates for use in promoting the Eucharistic Rosary Congress within your diocese or parish. These flyers are created in Microsoft PowerPoint. PowerPoint offers easy-to-use design tools that allow you to create a professional, printable one- or two-page flyer. Follow this step-by-step guide to get started.
Creating a Flyer from Scratch
Step 1: Open Microsoft PowerPoint
-
Launch Microsoft PowerPoint on your computer.
-
Select Blank Presentation to start from scratch.
-
If you are editing an existing flyer, open the PowerPoint file and proceed with modifications.
Step 2: Set Up Your Flyer Layout
-
Click on Design > Slide Size > Custom Slide Size.
-
Change the width and height to 8.5 x 11 inches for a standard flyer size.
-
Click OK and then choose Ensure Fit if prompted.
-
For a two-page flyer, duplicate the slide by right-clicking the slide in the left panel and selecting Duplicate Slide.
Step 3: Add and Format Text
-
Click Insert > Text Box and draw a text area where needed.
-
Type your content and use the toolbar to format the text.
-
Editing text:
-
Change font style using the Font dropdown menu.
-
Adjust size using the Font Size option.
-
Use Bold, Italic, and Underline for emphasis.
-
Align text using the Alignment buttons.
-
Modify text color with the Font Color option.
-
Step 4: Insert Images and Graphics
-
Click Insert > Pictures, then choose This Device (for local files) or Online Pictures to find free images.
-
Use only copyright-free religious artwork. Recommended sources:
-
Wikimedia Commons (https://commons.wikimedia.org)
-
Unsplash (https://unsplash.com)
-
Public Domain Renaissance paintings (e.g., works by Raphael, Michelangelo, or Caravaggio)
-
-
Avoid AI-generated religious images for authenticity.
-
Resize and position images appropriately to create a balanced layout.
Step 5: Enhance Aesthetic Appeal
-
Use white space effectively to maintain clarity.
-
Choose legible fonts and maintain a consistent font style and size.
-
Ensure color contrast for readability.
-
Align text and images for a professional look.
Step 6: Save and Share
-
Click File > Save As and choose PDF for a print-ready format.
-
To share digitally, go to File > Export > Create PDF/XPS Document and save the file.
-
For high-quality printing, use Print Settings to ensure the best resolution.
Editing a Flyer Template
Step 1: Open the Template
-
Access the provided PowerPoint flyer template.
-
Click File > Save As and rename the file to create your own editable version.
-
Ensure that the file is saved in a PowerPoint format (.pptx) to retain editability.
Step 2: Update Flyer Information
-
Click on existing text boxes and replace placeholder text with:
-
Event date, time, and location.
-
Contact information and any additional details.
-
-
Maintain the consistent font style and size used in the original design.
Step 3: Modify Images and Graphics
-
If needed, replace images by selecting the image and clicking Change Picture.
-
Ensure all images adhere to copyright guidelines.
-
Adjust layout as necessary to fit updated content.
Step 4: Enhance Aesthetic Appeal
-
Use white space effectively to maintain clarity.
-
Choose legible fonts and maintain a consistent font style and size.
-
Ensure color contrast for readability.
-
Align text and images for a professional look.
Step 6: Save and Share
-
Click File > Save As and choose PDF for a print-ready format.
-
To share digitally, go to File > Export > Create PDF/XPS Document and save the file.
-
For high-quality printing, use Print Settings to ensure the best resolution.
By following these steps, you can efficiently create or edit a flyer that is visually appealing and effectively promotes your event.

