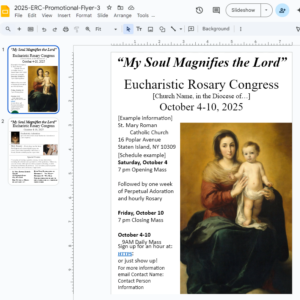
How to Edit/Create a Flyer in Google Slides
We provide our coordinators with a wide variety of Flyer Templates for use in promoting the Eucharistic Rosary Congress within your diocese or parish. These flyers are created in Microsoft PowerPoint, but for those who do not have access to PowerPoint , Google Slides also offers an intuitive design interface that allows you to create a polished, printable one- or two-page flyer with ease. Below is a step-by-step guide to help you through the process.
Creating a Flyer from Scratch
Step 1: Open Google Slides
-
Go to Google Slides and log in with your Google account.
-
Click on the Blank Presentation option to start from scratch.
-
If working from an existing flyer, upload the file to Google Drive and open it with Google Slides.
Step 2: Set Up Your Flyer Layout
-
Click on File > Page setup and change the slide size to standard paper dimensions:
-
For an 8.5 x 11-inch flyer, select Custom and enter 8.5" by 11".
-
For a two-page flyer, duplicate the slide by right-clicking the slide in the left panel and selecting Duplicate slide.
-
-
Adjust margins by inserting shapes or using guidelines for balanced spacing.
Step 3: Add and Format Text
-
Click Insert > Text box and drag to create a text area.
-
Type your content and adjust font styles in the toolbar at the top.
-
Editing text:
-
To change font style, select the text and use the Font dropdown menu.
-
Adjust size using the Font Size option.
-
Use Bold, Italic, and Underlined formatting for emphasis.
-
Align text using the alignment buttons for better readability.
-
Change text color using the Text color button.
-
Step 4: Insert Images and Graphics
-
Click Insert > Image, then choose Upload from computer, Search the web, or Drive.
-
Use only copyright-free images for religious use. Recommended sources:
-
Wikimedia Commons (https://commons.wikimedia.org)
-
Unsplash (https://unsplash.com)
-
Public Domain Renaissance paintings (e.g., works by Raphael, Michelangelo, or Caravaggio)
-
-
Avoid AI-generated religious images to maintain authenticity.
-
Resize and position images appropriately to balance the layout.
Step 5: Enhance Aesthetic Appeal
-
Use white space effectively to maintain clarity.
-
Choose legible fonts and maintain a consistent font style and size.
-
Ensure color contrast for readability.
-
Align text and images for a professional look.
Step 6: Save and Share
-
Click File > Download and choose PDF for a print-ready format.
-
To share digitally, go to File > Share, then select Anyone with the link can view and copy the link for distribution.
-
If printing, use high-resolution settings to ensure clarity.
Editing a Flyer Template
Step 1: Open the Template
-
Download the template of your choice from the Flyer Templates page.
-
Go to Google Slides and log in with your Google account.
-
If you haven't used Google Slides before, you may need to Create a New Presentation by clicking the plus sign where it says "Blank Presentation".
-
Click File > Open, and then click Upload when the screen pops up.
-
Drag and drop the PPT file onto the box.
-
Go back to File > Open, and open the template you uploaded.
-
Rename the file to reflect your event details.
Step 2: Update Flyer Information
-
Click on existing text boxes and replace placeholder text with:
-
Event date, time, and location.
-
Contact information and any additional details.
-
-
Ensure font styles and sizes remain consistent with the original design.
Step 3: Modify Images and Graphics
-
If needed, replace images by selecting the image and clicking Replace image.
-
Ensure all images adhere to copyright guidelines and maintain the aesthetics indicated below..
-
Adjust layout as necessary to fit updated content.
Step 4: Enhance Aesthetic Appeal
-
Use white space effectively to maintain clarity.
-
Choose legible fonts and maintain a consistent font style and size.
-
Ensure color contrast for readability.
-
Align text and images for a professional look.
Step 5: Save and Share
-
Click File > Download and choose PDF for a print-ready format.
-
To share digitally, go to File > Share, then select Anyone with the link can view and copy the link for distribution.
-
If printing, use high-resolution settings to ensure clarity.
By following these steps, you can efficiently create or edit a flyer that is visually appealing and effectively promotes your event.

